PSP rendering tricks - a new blog post series
In these posts, I'm going to look at some of the more interesting visual effects that games accomplish on the PSP, and how they do it. The PSP's GPU is very limited by modern standards, but it's still capable of quite a lot of interesting things if your really know how to use it.
Burnout Dominator's lens flare effect
First up, one of the trickiest lens flare effects seen on the PSP.
Lens flare effects are easy to do on modern GPUs. There are lots of different approaches, both image-based which can handle light sources of any shape but are generally not very detailed, and sprite-based, which are more limited in terms of the light source, but can look really complex and colorful. There are queries that can be used to figure out how many pixels actually got rendered when drawing the sun sprite, for example, that can be used to control the size and shape of the lens flare on the next frame, or you can read back the Z buffer directly while drawing the sprites.
On old-school, fixed-function hardware such as that of the PSP, where you can’t even do multitexturing, and definitely can’t run any shader code, people had to get quite imaginative to achieve these effects. And the authors of Burnout Dominator certainly were, as we will see.
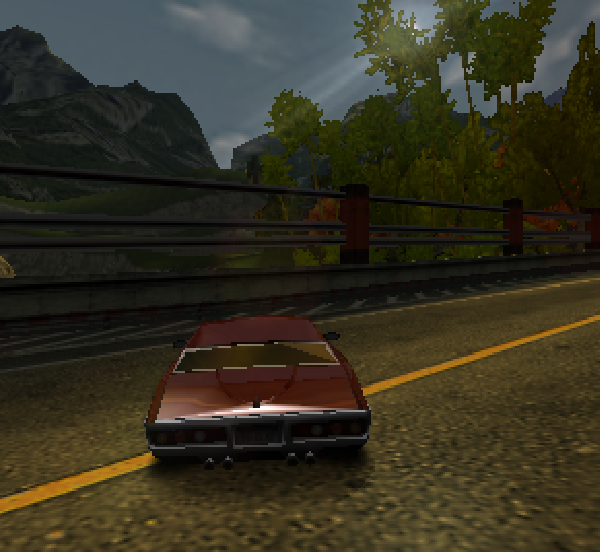
Let's start by looking at the wrong result - the way it was in PPSSPP before I started investigating the effect:
As you can see, the lens flare effect is visible going into the tunnel, and through various trees and stuff.
There are two main parts to rendering a traditional lens flare correctly:
- Determining the location, and measuring the sun coverage (how brightly the flare should render should be based on how much of the sun is covered by blocking things).
- Using the determined coverage value, adjust the brightness of the lens flare. If the source of light is fully covered, no lens flare should be drawn, while if it’s partially covered or not covered at all, the lens flare should be drawn but with a brightness adjusted by the coverage.
Computing the sun coverage
To achieve this, here’s what Burnout Dominator does to measure the sun coverage, every frame:
First, it makes a backup copy of a 14x14 rectangle around the sun location on-screen, and then renders a black and a white rectangle on top, with only the black one being depth tested. The result is a binary mask of where the sun is visible.
It then downsamples (through bilinear filtering) this binary image to 8x8, sitting out in the unused border of the main framebuffer. Then, it downsamples this 8x8 image three more times, until we reach a single value, which is thus the average of the black and white pixels, and thus an effective measurement of the coverage. The final value is for some obscure reason spread out over four pixels.
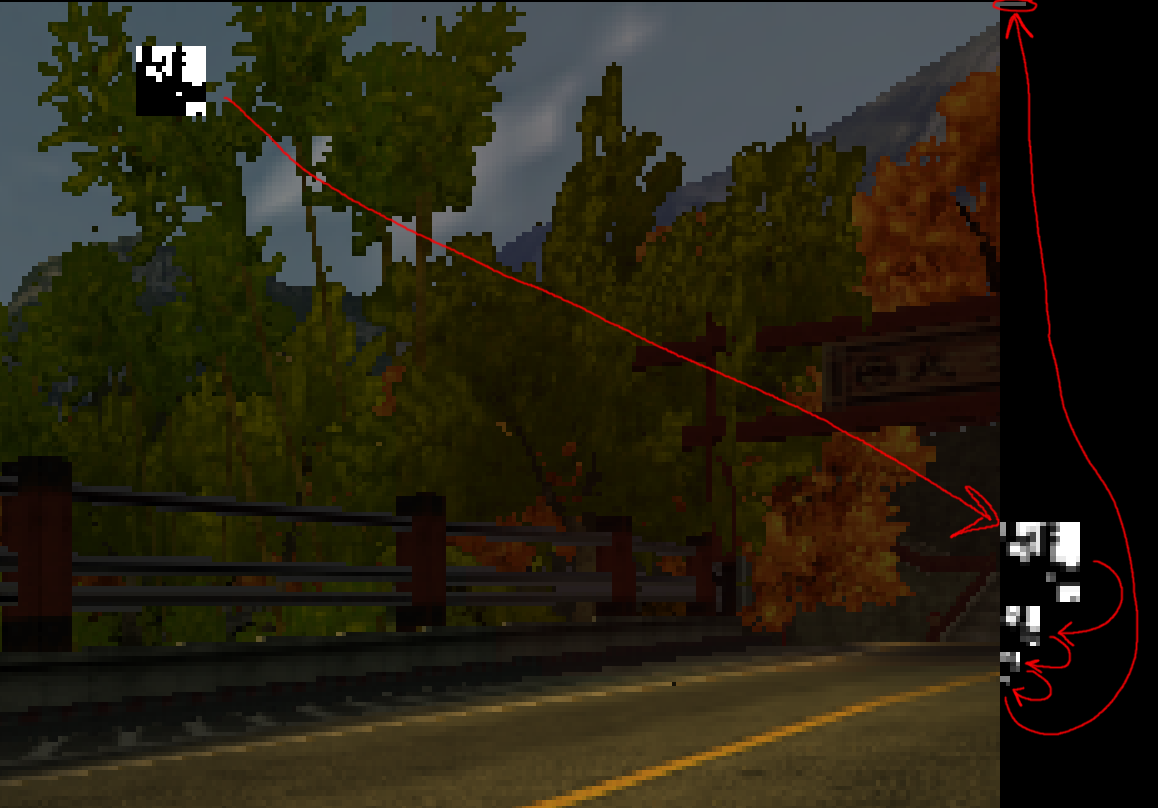
After that, it restores the little modified square of image the way it was, using the backup copy from before:
Applying the coverage value
So, we now have the coverage as a byte value. We could now treat this value as a 1x1 texture and let it influence the brightness of basic gouraud shaded geometry, like some simple hexagons and stuff, could look OK. Ridge Racer, for example, stops here (though uses a simpler accumulation method) - it draws simple shapes.
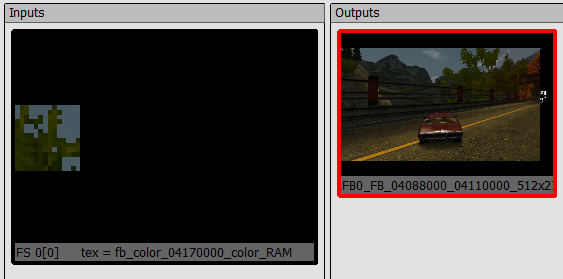
But Burnout gets fancier, and uses a nice lens flare texture. We are now faced with the challenge of how to use this arbitrary value sitting in an image, to influence the brightness of the lens flare texture, using only the PSP GPU. We do not want to use the CPU to copy the brightness value to some vertex colors, for example, as that would require expensive synchronization, instead we need to coax the GPU to do the work directly.
If we had multitexturing with combiners, or even shaders, we’d just sample this texel and multiply the lens flare texture by it, but we don’t have that. However, the PSP has some others features we can use - or misuse. Games on the PSP mostly use palletted textures, 4-bit or 8-bit indexed color. Palettes can be loaded from RAM or VRAM. And that opens up for a cute trick: Since on the PSP, memory is just memory, the game can actually overlay a render target on top of the palette memory belonging to the lens flare texture in memory, and render into the alpha channel of this render target, while texturing from a 1x1 texture carefully defined to overlap the brightness value from the previous coverage computation in memory! Then it can finally draw the lens flare using a texture with that modified CLUT loaded, which now has the correct alpha value in all colors, matching the coverage.
A problem with a deep solution
Except… The PSP is actually not able to write arbitrary values into the alpha channel of a 32-bit render target, at all! Not sure exactly why that is, but it is likely related to the fact that on the PSP, the alpha and stencil buffers share bits. So how do we actually accomplish it anyway, given that we just stated that it’s impossible?
This is where we get to the next level of trickery. When the game renders to the CLUT, it doesn’t use 32-bit color, instead it uses 16-bit “565” color, setting the render width to be 512, twice the size of the palette. Now, every second 16-bit pixel can be used to control the A and B channels of a color, and the other ones will control the G and R channels. The mapping is not trivial, let’s try to see that:
The same 32 bits in memory (each letter represents is 1 bit):
AAAAAAAA BBBBBBBB GGGGGGGG RRRRRRRR (one 32-bit color value)
bbbbbggg gggrrrrr bbbbbggg gggrrrrr (two 16-bit color values)
11111111 00000000 11111111 00000000 (bitmask for writing, see below)
When I said that it textures from the coverage value and writes it to the palette, what it really does is that it textures using another palette with a green-blue gradient to translate the coverage value into the appropriate green and blue bits to properly fill the alpha channel of the 32-bit CLUT entries, by rendering using 16-bit colors! The PSP GPU conveniently has a framebuffer bitmasking feature, where you can prevent writing to specific bits of each color value when rendering (modern GPUs don’t have that, they have a bit per channel instead), and it sets what's effectively a repeating 0xFF00 16-bit mask.
That creates a new problem though, it will now write that value to green as well in the corresponding 32-bit color values, as we can see in the diagram, which we don’t want. The color write bitmask is applied individually to each 16-bit pixel here, so that’s not very useful. So what can we use to mask away the writes to every other pixel? Well we are in fact using a GPU, so why not initialize a Z buffer with 0, 32767, 0, 32767, and use depth testing to discard every second value? And that’s what the game does, drawing to the palette, using a depth value and a depth compare function to make sure only every second 16-bit pixel actually gets written.
The result
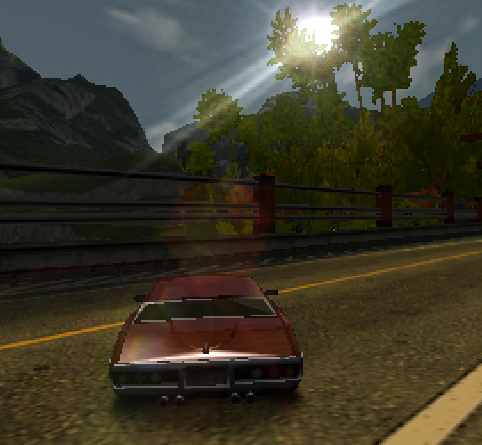
And we reach the final moment, where the coverage value sits properly in the alpha channel of each entry of the color palette of the lens flare texture, and we can just do a simple draw to get it on the screen with the appropriate brightness.
Finally, we have:
And a video:
Phew! Getting this to work in PPSSPP was.. not trivial. I could write a whole other article about the improvements that needed to be done to the rendering pipeline so that all of the tricky steps above would actually work correctly.